DDNet Mobile Tutorial
This is the tutorial about DDNet Mobile version.
Download
The latest mobile version is 9.3.1, and only Android available.Click here to download. Some devices can't install ddnet normally, as the version is too old. You may need to install them by Android Debug Bridge.
Getting to Start
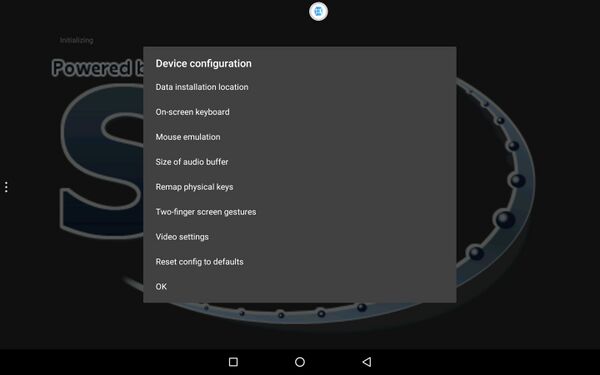
When you firstly open the game, you can see "Tap left joystick to jump". Reopen the game, and there will be a bar with "CHANGE DEVICE CONFIGURATION". Tap that bar to enter the setting interface.

In this interface, once alterations are made, they will be automatically saved.
Buttons and Remap
Remap is a special option that differs from PC DDNet. Unlike the normal keyboard, where every key on has its own name, such as ctrl, alt. Before binding, we need to give a name to the buttons, so that is why remapping is necessary.
On-screen keyboard, Remap physical keys, Two-finger screen gestures. The three options are related to remapping.
On-screen keyboard
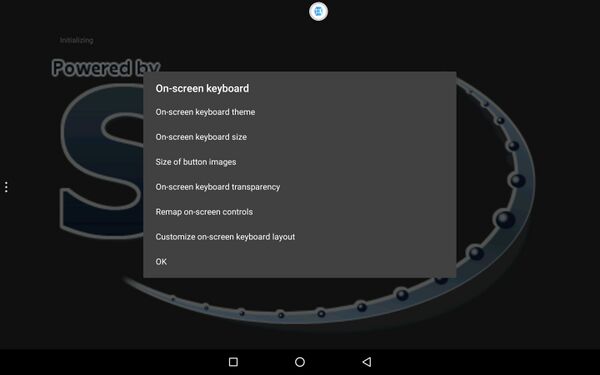
This option can change settings about the buttons on screen.

- On-screen keyboard theme
- Change the texture of the buttons. Sun is set to be default, and it is the only texture to show where you touch on the joystick.
- On-screen keyboard size
- Change the touchable range of the buttons. It's not recommended to edit it there.
- Size of button images
- Change the size of button images, won't do anything to the touchable range of a button.
- On-screen keyboard transparency
- Change the trabsparency of the button images.
- Customize on-screen keyboard layout
- It's highly recommended to edit button layout there. You can drag buttons directly, or tap to choose one button, then slide in an empty place to change it's shape. There will be words above to inform you what this button is.
- If your texture is not sun, the texture shown in the customize interface will be Simple Theme.
- Remap on-screen controls
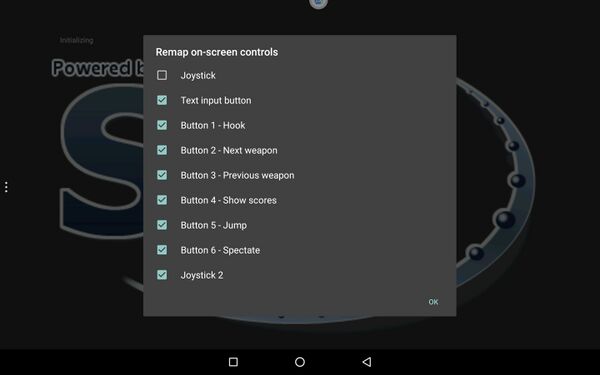
- There are 7 buttons and 2 joysticks in total. You can't remap Text input button and joysticks. It's highly recommended to turn off the Joystick1, or you can't jump while running, or start to run without jumping. To turn off it, tap into the option and follow the picture.

- Joystick 2 is the only way to hook. So don't turn it off. Touch ok to save settings and enter remapping, then you will see this.

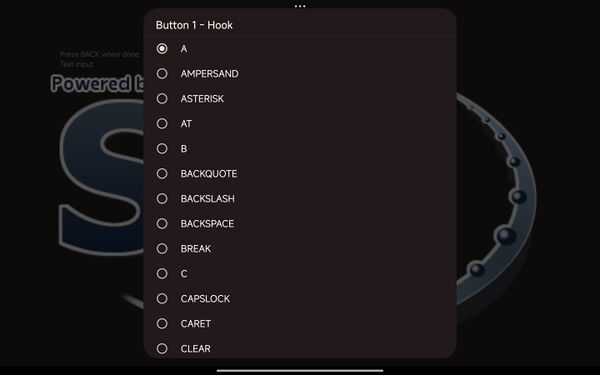
- Mapping a button to a key actually makes it behaves just like the key. For example, if you map button 1 to A, then button 1 will be completed the same as the A on the keyboard.
- The name of the button being mapped is on the top. You don't need to care about its usage according to its name. Also, the button usually have a default mapping. We recommend to map buttons to A, D, SPACE, X, PAGEDOWN. That's because A,D,Space have already been bound by default, meaning you don't have to bind them again if you map the button to keys that have been bound already.
- Also, you have to replace the button to fire. It is mouse1 by default. To trigger mouse1, you have to tap empty place on the screen. However, you can't trigger mouse1 while holding on-screen buttons. If you don't change, it will be hard to play. We recommend to remap a on-screen button to fire, for example, map the button 6 to WORLD_55, then bind world_55 "+fire".
- Default: A=Move left, D=Move right, Space=Jump, X=Switch dummy, Pagedown=Nextweapon, Mouse1=Fire. Mouse1 is mouse left button.
- If you quit remapping before all buttons are remapped, the settings that have been made will be saved, and the settings for the remaining buttons won't change. After remapping, go change the button layout, and the work for on-screen buttons is done.
Remap physical keys
- Usually, our device has volume keys and a back button. These buttons might be hard to reach while playing, so don't make them needed to be used very usually.
