This is the tutorial about DDNet Mobile version. Before you start, I wanna inform you, you are going to fight against lots of bugs and issues. This tutorial requires readers to have basic binding knowledges, knowing what function you need. And if you want any help about the mobile version, find ForgottenCat in wiki, Bilibili, or Discord. Most people know little about mobile version, don't disturb them too much.
Also, the tutorial takes my own settings as a reference. At the end of tutorial, I will take my settings as an example, to help you understand how everything work better.
Download
The latest mobile version is 9.3.1, and only Android available.Click here to download.
Some devices can't install ddnet normally, as the version is too old. You may need to install them by Android Debug Bridge.
Getting to Start
When you firstly open the game, you can see "Tap left joystick to jump". Reopen the game, and there will be a bar with "CHANGE DEVICE CONFIGURATION". Tap that bar to enter the setting interface.
the main interface
In this interface, once alterations are made, they will be automatically saved.
Buttons and Remap
Remap is a special option that differs from PC DDNet. Unlike the normal keyboard, where every key on has its own name, such as ctrl, alt. Before binding, we need to give a name to the buttons, so that is why remapping is necessary.
On-screen keyboard, Remap physical keys, Two-finger screen gestures. The three options are related to remapping.
On-screen keyboard
This option can change settings about the buttons on screen.
the on-screen button setting interface
On-screen keyboard theme
Change the texture of the buttons. Sun is set to be default, and it is the only texture to show where you touch on the joystick.
On-screen keyboard size
Change the touchable range of the buttons. It's not recommended to edit it there.
Size of button images
Change the size of button images, won't do anything to the touchable range of a button.
On-screen keyboard transparency
Change the trabsparency of the button images.
Customize on-screen keyboard layout
It's highly recommended to edit button layout there. You can drag buttons directly, or tap to choose one button, then slide in an empty place to change it's shape. There will be words above to inform you what this button is.
If your texture is not sun, the texture shown in the customize interface will be Simple Theme.
Remap on-screen controls
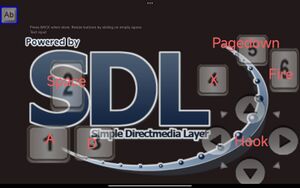
There are 7 buttons and 2 joysticks in total. You can't remap Text input button and joysticks. It's highly recommended to turn off the Joystick1, or you can't jump while running, or start to run without jumping. To turn off it, tap into the option and follow the picture.
Turn off the Joystick1
Joystick 2 is the only way to hook. So don't turn it off. Touch ok to save settings and enter remapping, then you will see this.
Remap interface
Mapping a button to a key actually makes it behaves just like the key. For example, if you map button 1 to A, then button 1 will be completed the same as the A on the keyboard.
The name of the button being mapped is on the top. You don't need to care about its usage according to its name. Also, the button usually have a default mapping. We recommend to map buttons to A, D, SPACE, X, PAGEDOWN. That's because A,D,Space have already been bound by default, meaning you don't have to bind them again if you map the button to keys that have been bound already.
Also, you have to replace the button to fire. It is mouse1 by default. To trigger mouse1, you have to tap empty place on the screen. However, you can't trigger mouse1 while holding on-screen buttons. If you don't change, it will be hard to play. We recommend to remap a on-screen button to fire, for example, map the button 6 to WORLD_55, then bind world_55 "+fire".
Default: A=Move left, D=Move right, Space=Jump, X=Switch dummy, Pagedown=Nextweapon, Mouse1=Fire. Mouse1 is mouse left button.
If you quit remapping before all buttons are remapped, the settings that have been made will be saved, and the settings for the remaining buttons won't change. After remapping, go change the button layout, and the work for on-screen buttons is done.
Remap physical keys
Usually, our device has volume keys and a back button. These buttons might be hard to reach while playing, so don't make them needed to be used very usually. Firstly, press one of the physical keys in the interface shown in the picture.
[need picture]
Then press Show all keycodes. Other options don't work at all. Then map your physical keys freely. You can only map one key at the same time.
You can map physical keys to mouse1, but that doesn't make any sense. If you want to do that, choose Mouse emulation, then Left mouse click, then Physical key, then just tap one of the physical keys. You still need to touch the screen to move the cursor though.
Another unique advantage is that they can be bound easily. You can bind physical keys and mouse1 in a DDNet interface called Controls(PC ddnet has this as well). In that interface, all on-screen buttons will disappear, you can only activate physical keys and mouse1, meaning you can only bind them freely there.
Remap Two-finger screen gestures
4 gestures in total, they are Zoom in, Zoom out, Rotate left and Rotate right. Similar to physical keys, they can't be triggered easily like the on-screen buttons. So give them a less used function.
Normally we choose the Medium sensitivity. You can try yourself to see which option suits you best.
All two-finger gestures are bound to UNKNOWN by default. This is a invalid key, you can't bind them in ddnet. You have to map them to a valid key first.
To do these gestures, you need to put only two fingers on the empty locations on the screen. For Zoom in/out, move two fingers away from/close to the center.(Imagine you are zooming a picture). For Rotate left/right, you can let one finger stay still, then move another finger around the silent one.
Another problem is, when triggering Rotate right, usually Zoom out will be triggered at the same time. I seldom trigger other buttons by mistake, that is the only problem, you can try yourself.
Remap Note
Please write down or memorize every button what it's mapped to. Or you will suffer while binding later.
To make sure the key you map to has no bindings that you don't know by chance, you can map buttons to keys like "World_X". They are not bound by default.
After remapping, you can renter the mapping interface to check if the buttons are mapped correctly, the mapping will be shown at the top normally.
If you are going to place buttons like the layout shown in the picturethe layout, you'd better place the space button a little higher. Or bugs will cause while you are trying to kick a tee.(Tap the button A or D then Joystick 2 then Space, with a fast speed, the buttons may suddenly be useless unless you release all fingers on screen. The solution is to place space button a little higher, or you just move the finger higher while tapping space button).
In the Mouse emulation, you can set the Calibrate touchscreen. Touch 4 edge of the screen, then exit.
All mappings will be activated after you leave this interface and enter ddnet. Meaning all gestures and mappings for physical keys are inactive.
Remap Example
Button 1: A
Button 2: SPACE
Button 3: D
Button 4: X
Button 5: PAGEDOWN
Button 6: WORLD_55
Volume+: RCTRL
Volume-: LALT
Back: RETURN
Zoom in: WORLD_5
Zoom out: ESCAPE
Rotate left: K
Rotate right: F1
Explanation: You must includeRETURN, this can't be changed. This is the setting of ForgottenCat.
The key CTRL and ALT don't exist, instead, we have LCTRL and RCTRL, LALT and RALT. When binding, we can't bind ctrl as well. We need to bind rctrl "...".
Bind and Settings In-Game
If you know nothing about binding, go read the article. You need to know at least the basic commands such as toggle and +toggle, +left, cl_ddummy' and so on.
You can't just bind button1 "...", button 1 is not a real key name to bind in ddnet clinet. That is why we need to map, hope you remember all the mappings.